




How to do a push-up
For beginners who want chest, arm and core strength with a move that needs only floor space.
IJR · Sep 26, 2026 · 2 min read
Keep your body stiff in one straight line from the crown of your head to your heels. That single rigid line is what turns the bend of your elbows into work for your chest and arms instead of strain on your lower back.
Clear six feet of open floor. Wear a shirt and shorts that let your shoulders move and keep bare feet or flat shoes.
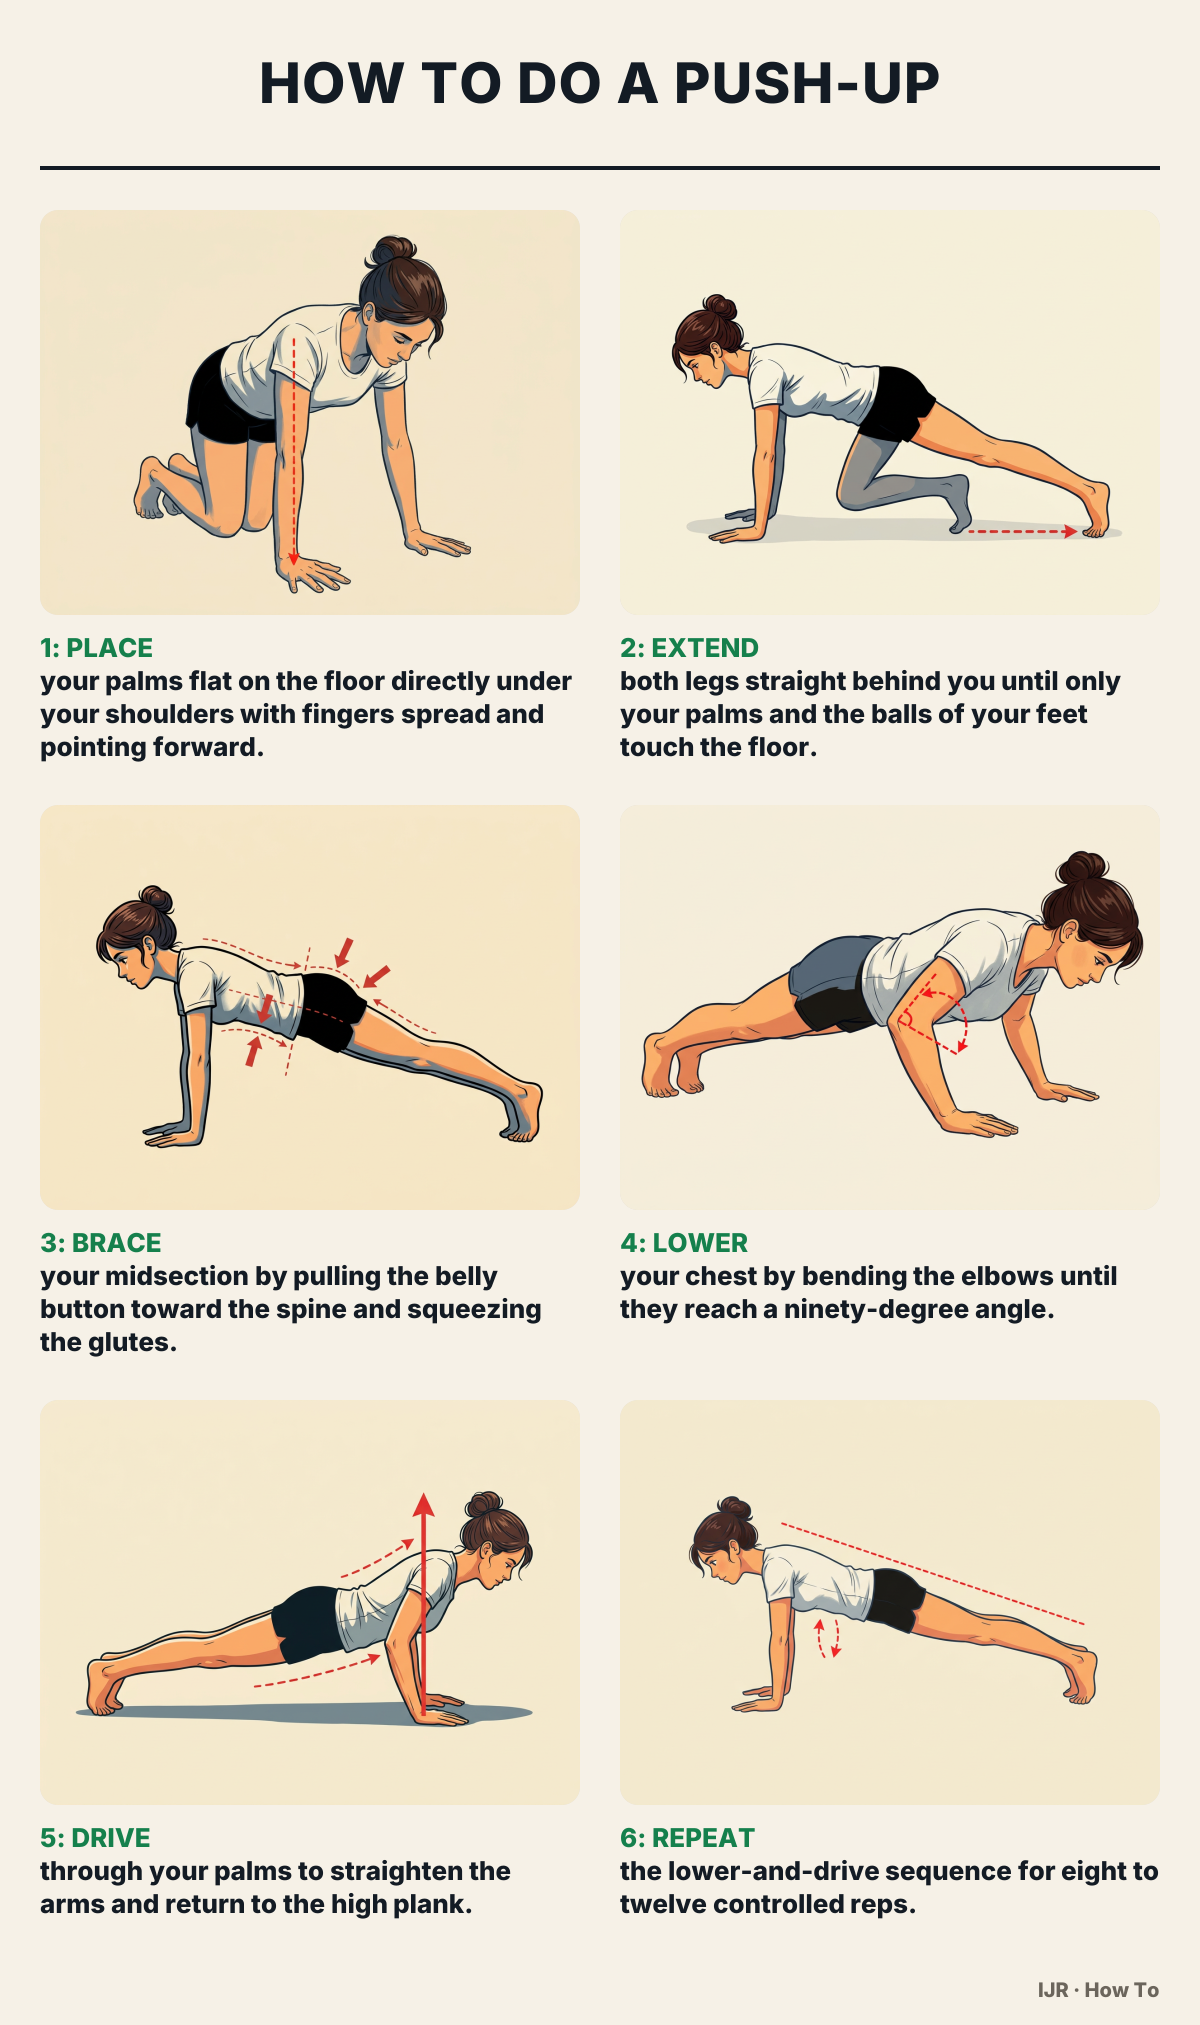
You'll need the six-foot floor space already cleared; a thin mat is optional under the hands. You know the placement is right when each arm hangs straight down and you can see your hands framing your face as you look between them.
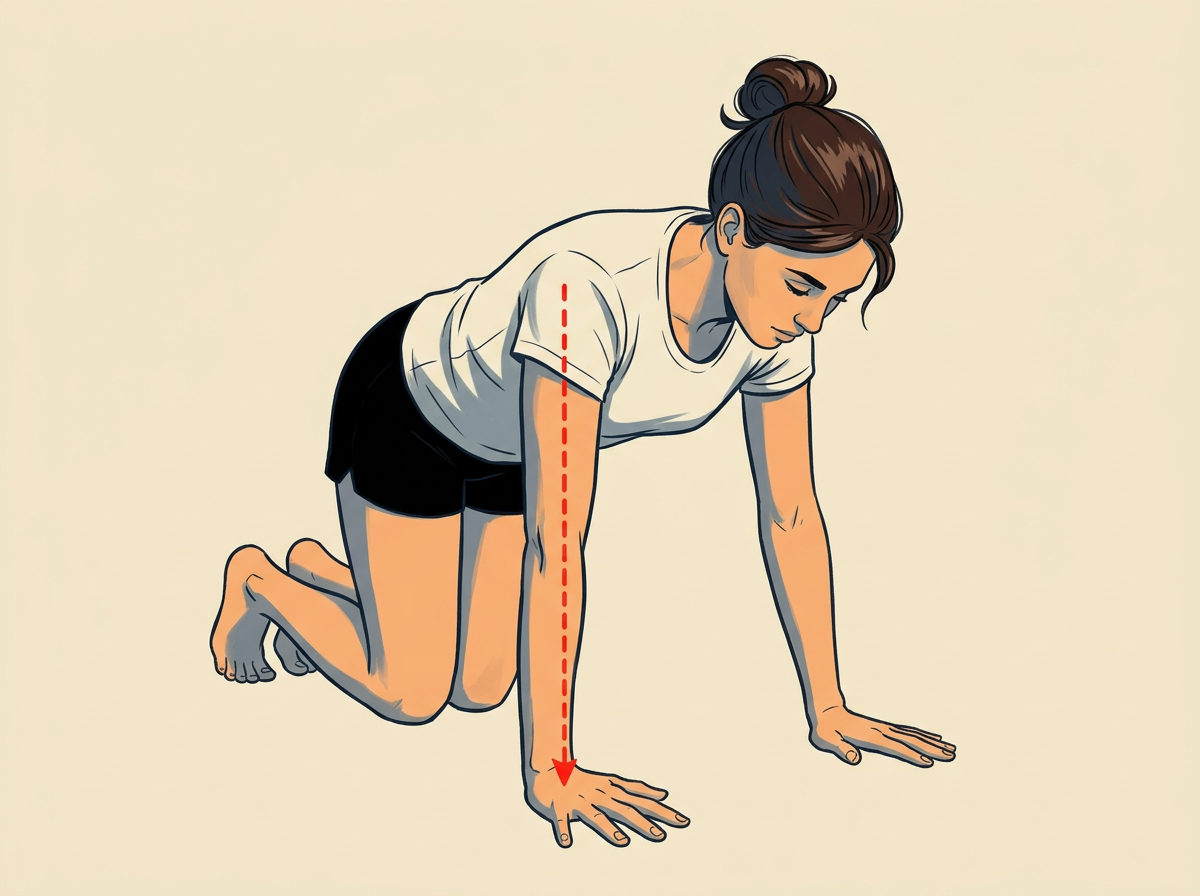
Walk the feet back one at a time while the hands stay fixed. You know the high plank is ready when your body forms one long line and your feet sit roughly hip-width apart. If you wobble, move the feet one inch wider.
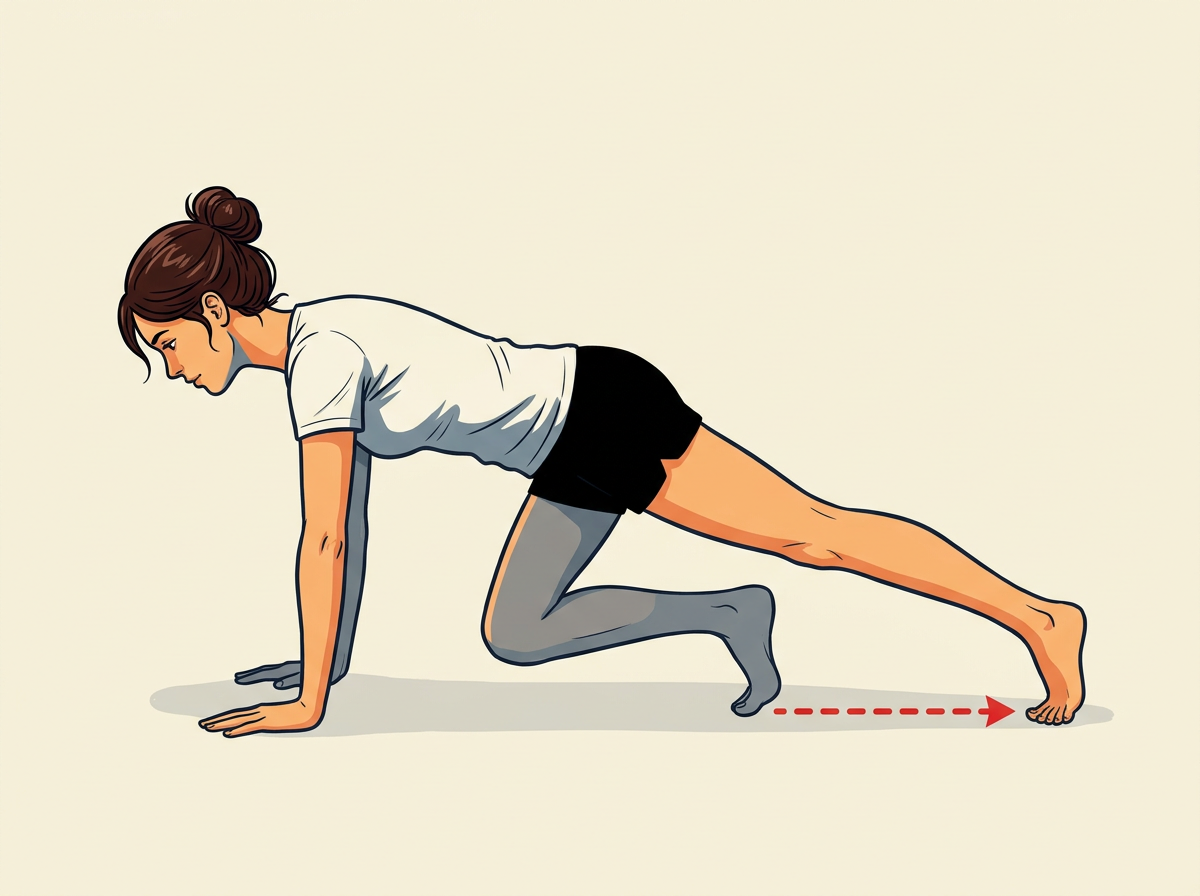
Keep the head in line with the spine so you gaze at the floor a foot ahead. You feel the brace lock when the hips stay level with the shoulders and the whole torso goes firm. Hold that tension without holding your breath.
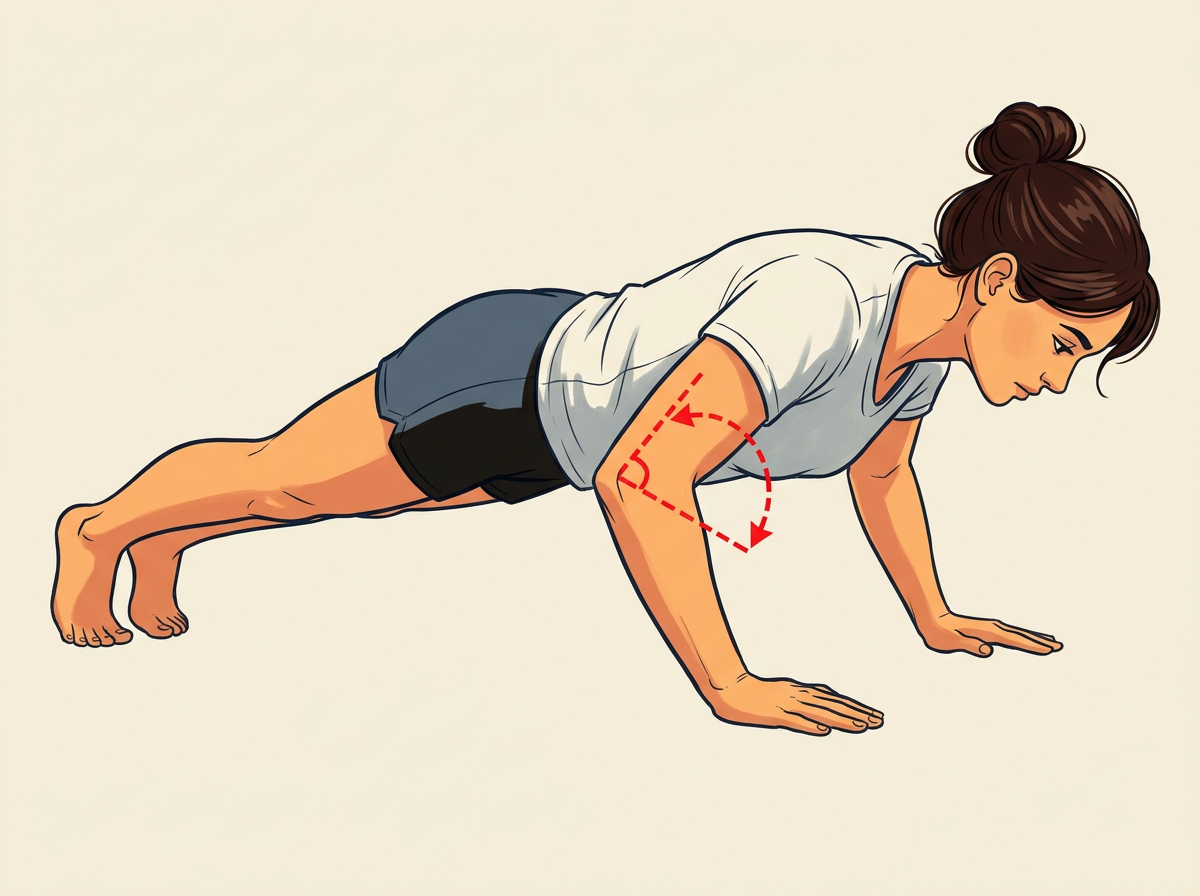
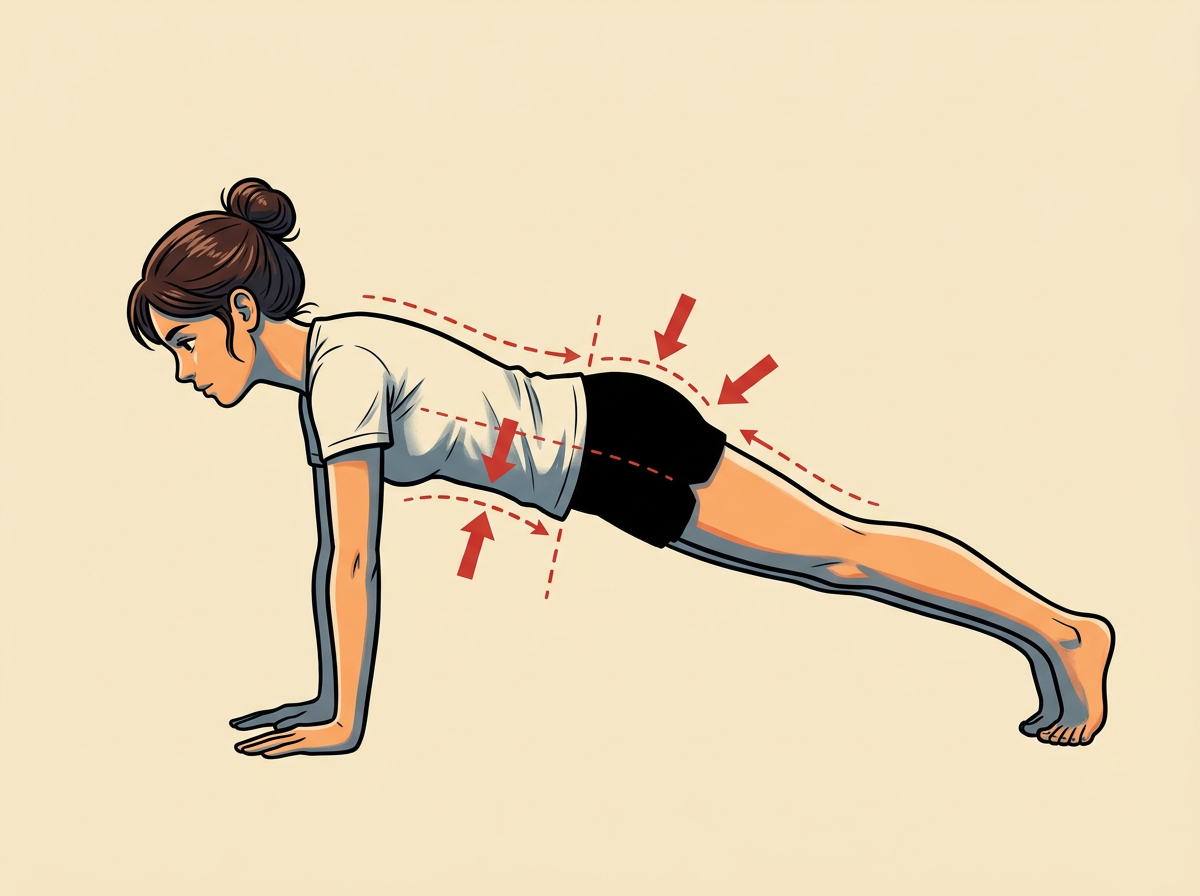
Elbows stay close to the body at roughly forty-five degrees from your sides. You know the depth is correct when your upper arms are parallel to the floor and your chest hovers about one inch above it. Move for a slow two-count down.
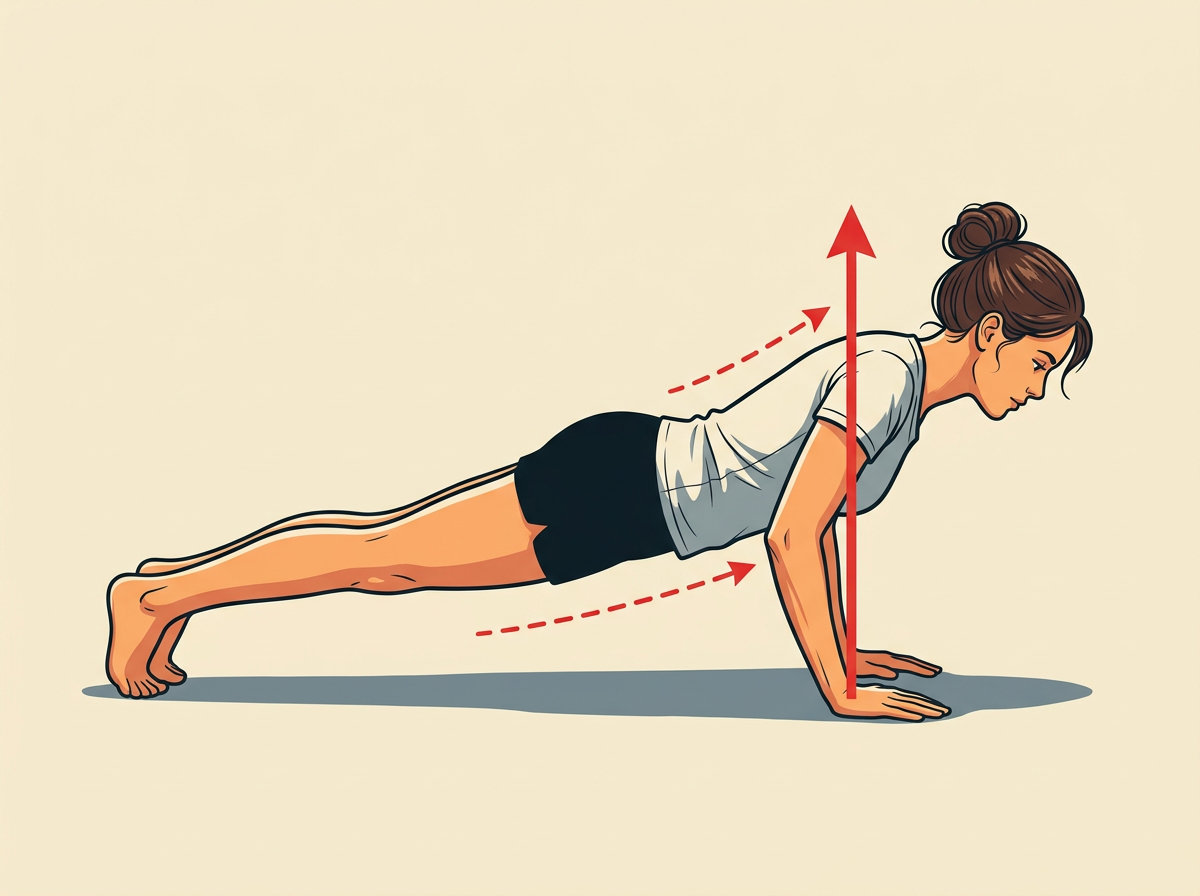
Exhale on the way up. You know the rep is finished when the elbows straighten softly and the head-to-heel line is straight again at the top. Do not let the shoulders shrug toward the ears.
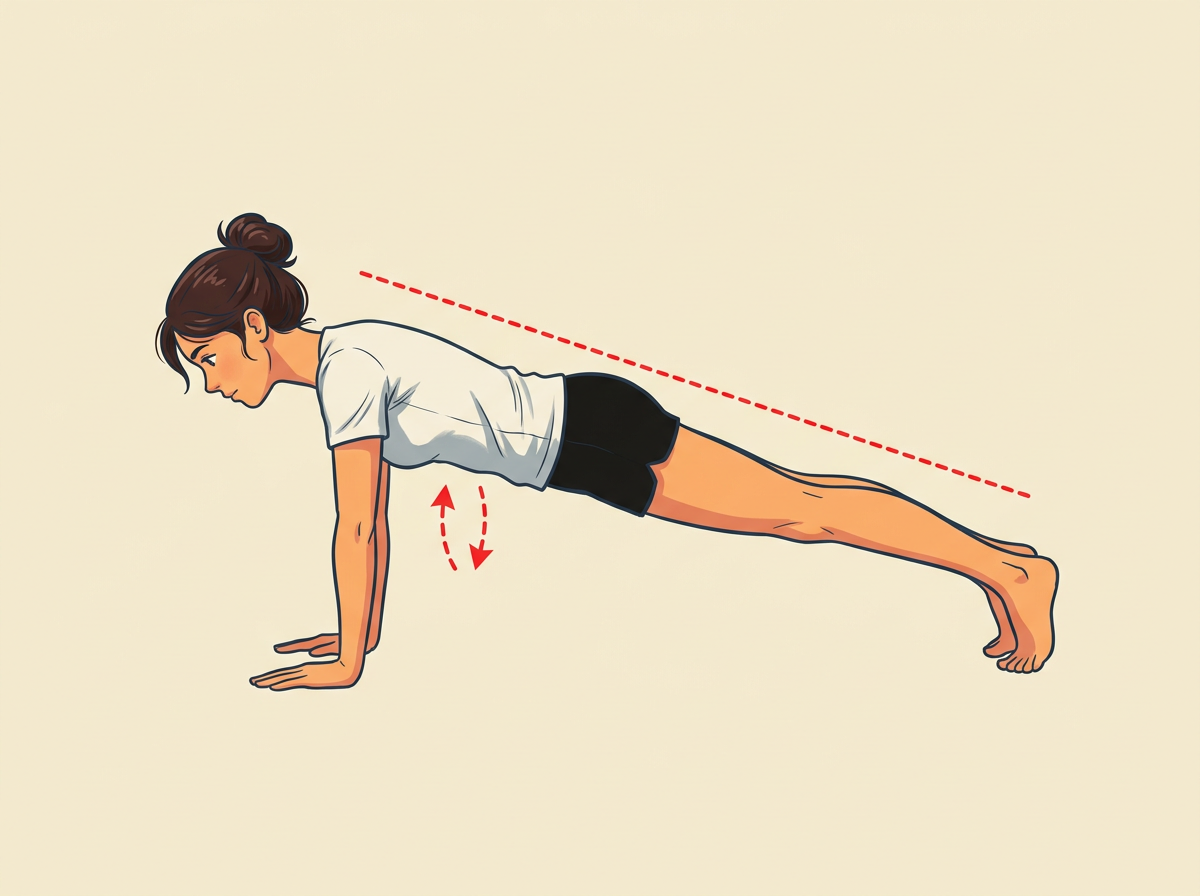
Reset the brace before every descent. You know the set is complete when the final rep still shows a straight body line and you can hold the top plank for two full seconds. Rest sixty seconds if you plan another set.
The most common mistake
Hips sag or pike when the core loosens mid-rep. Fix it by re-bracing the belly and glutes before each lower and checking the side-view line stays flat.