




How to tie a bowline knot
For campers and boaters who need a fixed loop that holds under load yet unties by hand afterward.
IJR · Sep 26, 2026 · 2 min read
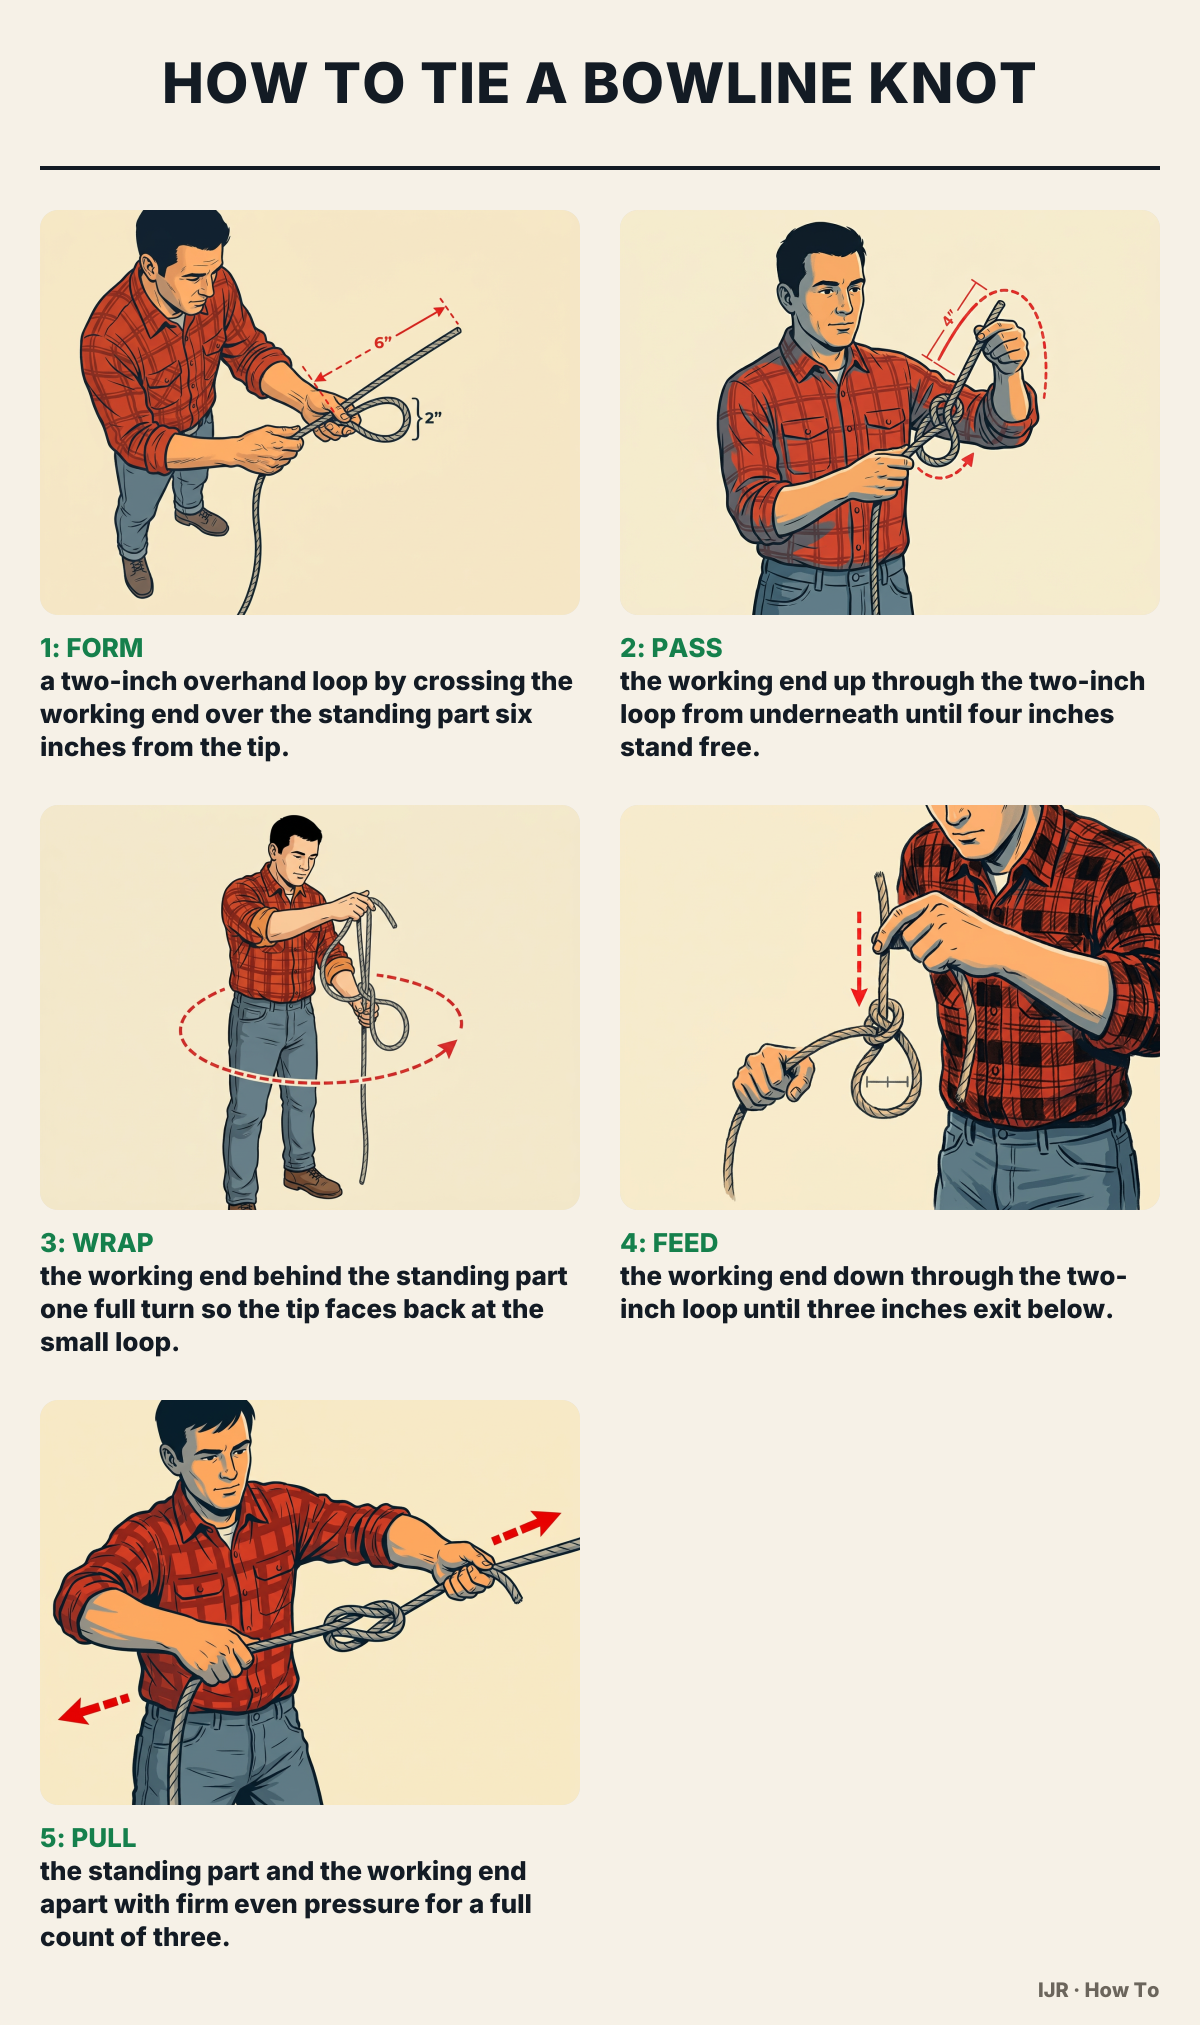
Every turn of the free end locks against the standing part so the loop cannot change size once weighted. You gain a strong eye that still unties with a simple push after use.
You'll need four feet of smooth rope and clear table space.
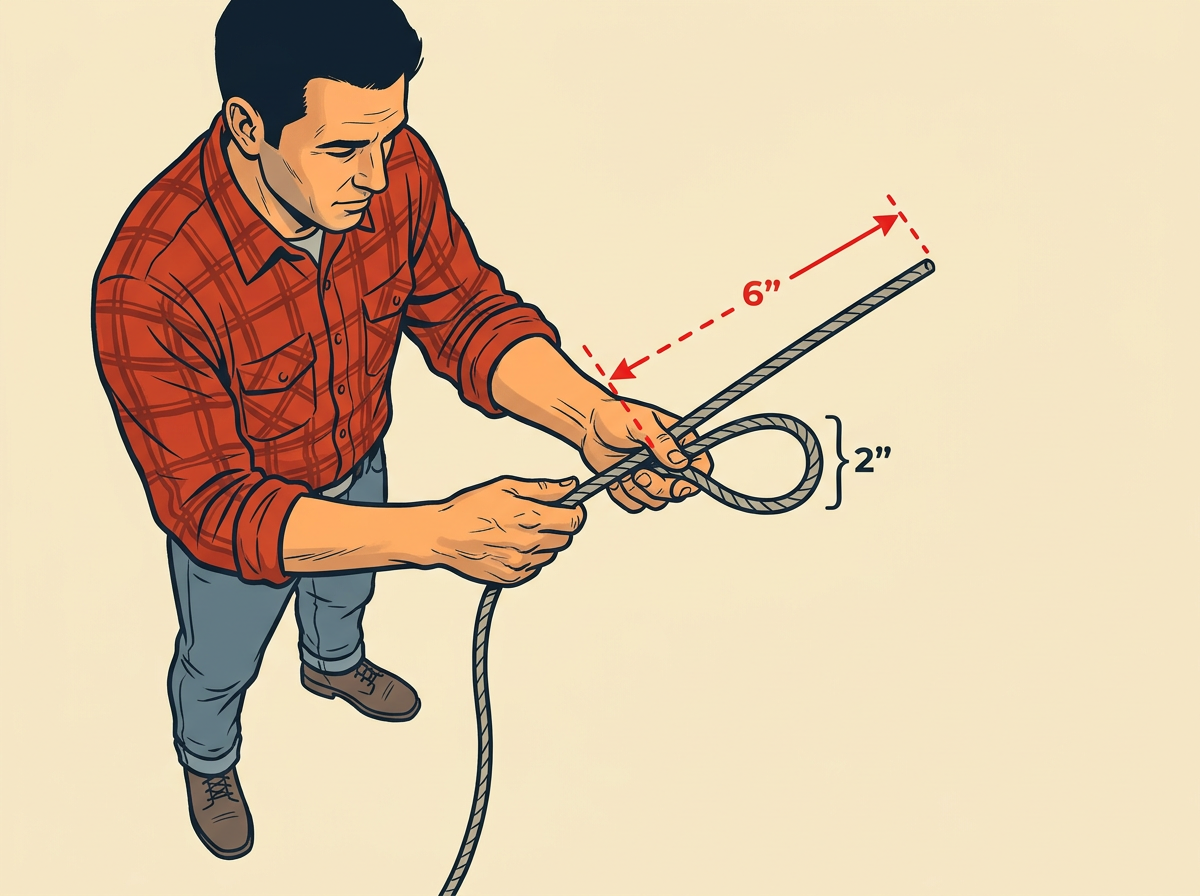
The working end must lie on top. You know the cross is right when the loop opens toward you like a small letter e. If the end lies underneath, uncross and lay it over instead.
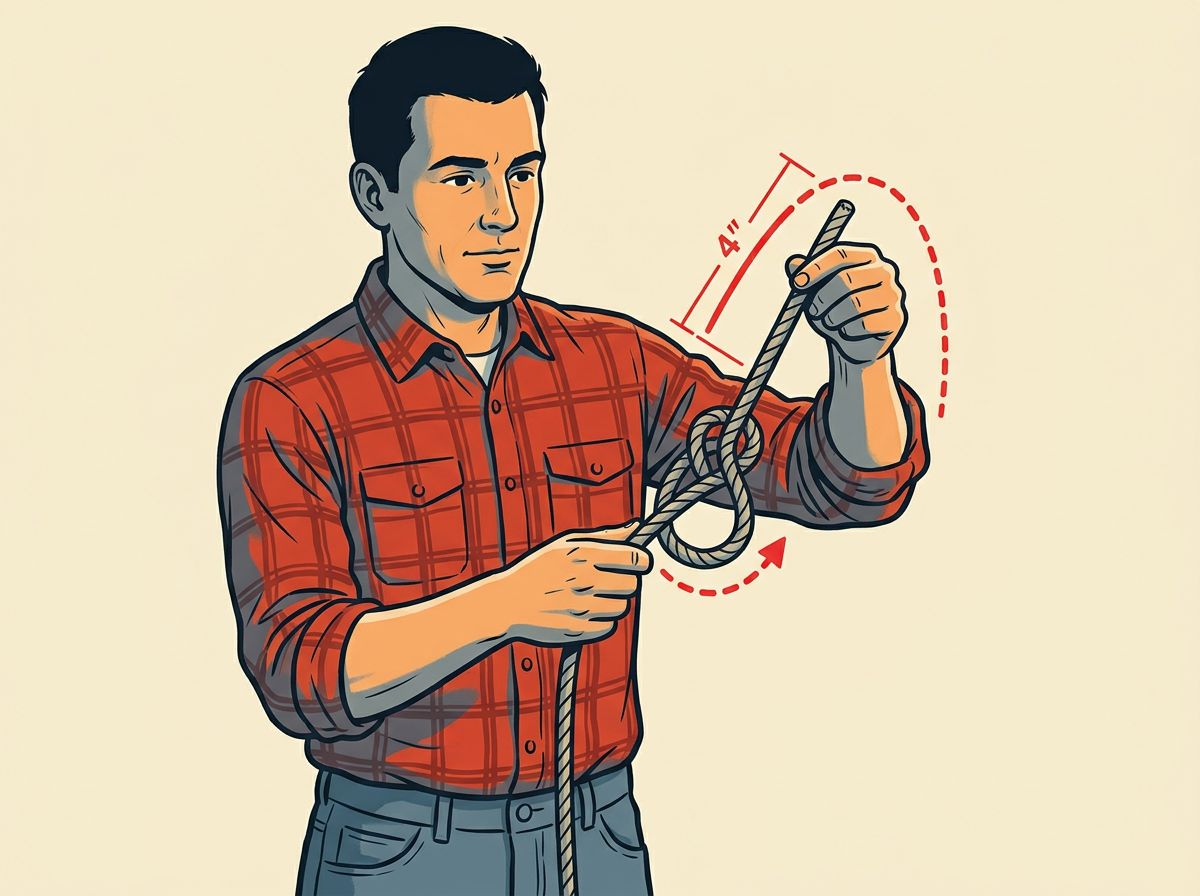
Keep the small loop from twisting as the end rises. The free tip points away from you once clear. If fewer than four inches emerge, push more rope through before wrapping.
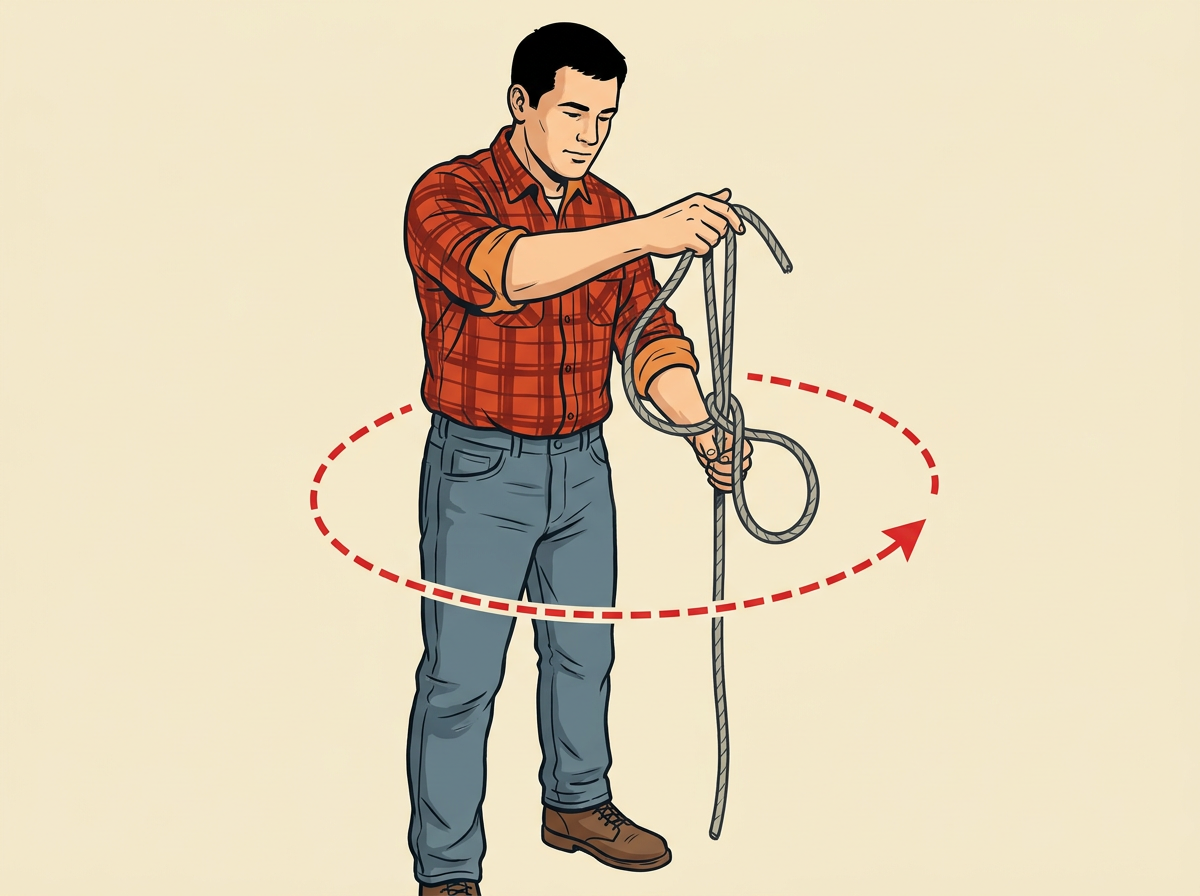
The turn stays close to the small loop without crossing it. You see a clear circle of rope when the tip returns to the front. If the tip ends up on the far side, unwrap and pass it the opposite way behind the standing part.
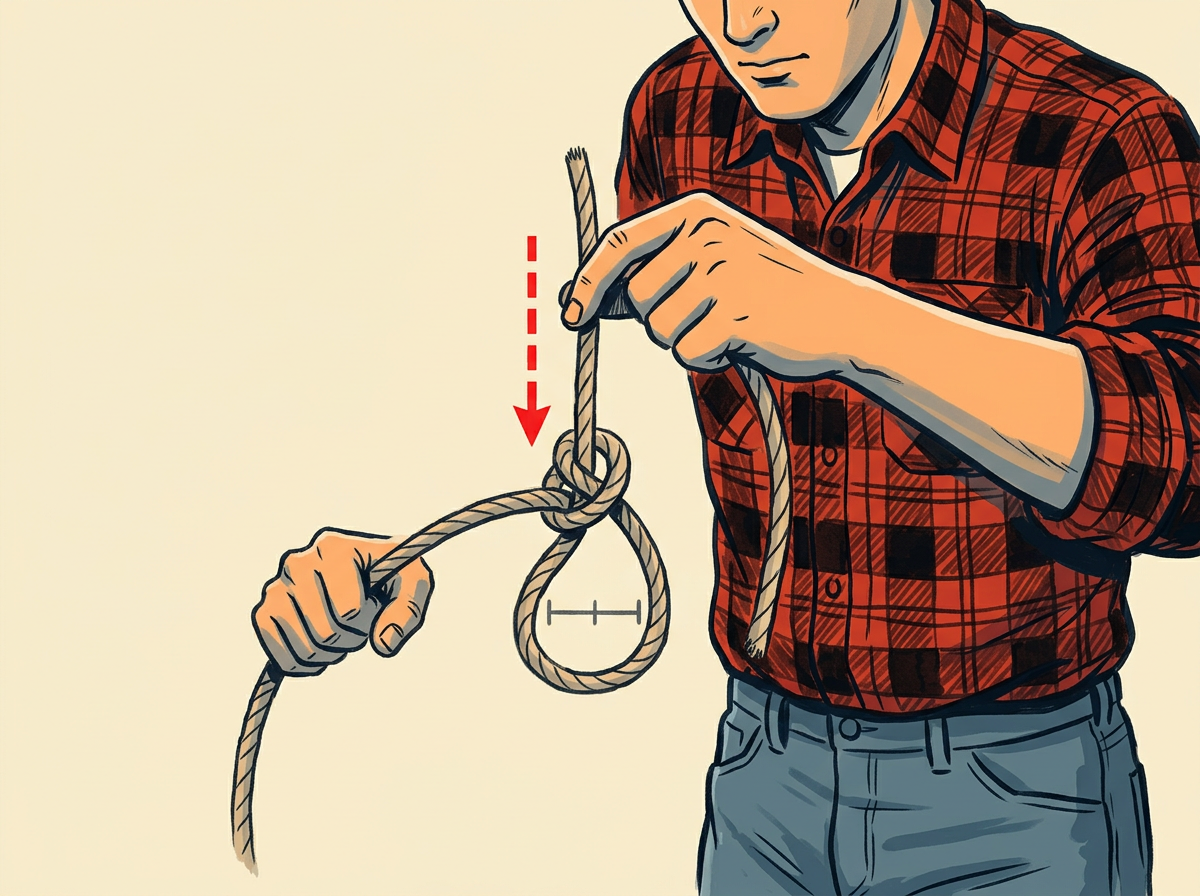
The end now runs beside the standing part outside the big loop. Confirm the weave by counting three rope parts locked in the small loop. If the end jams, open the small loop slightly with a finger and guide it through.
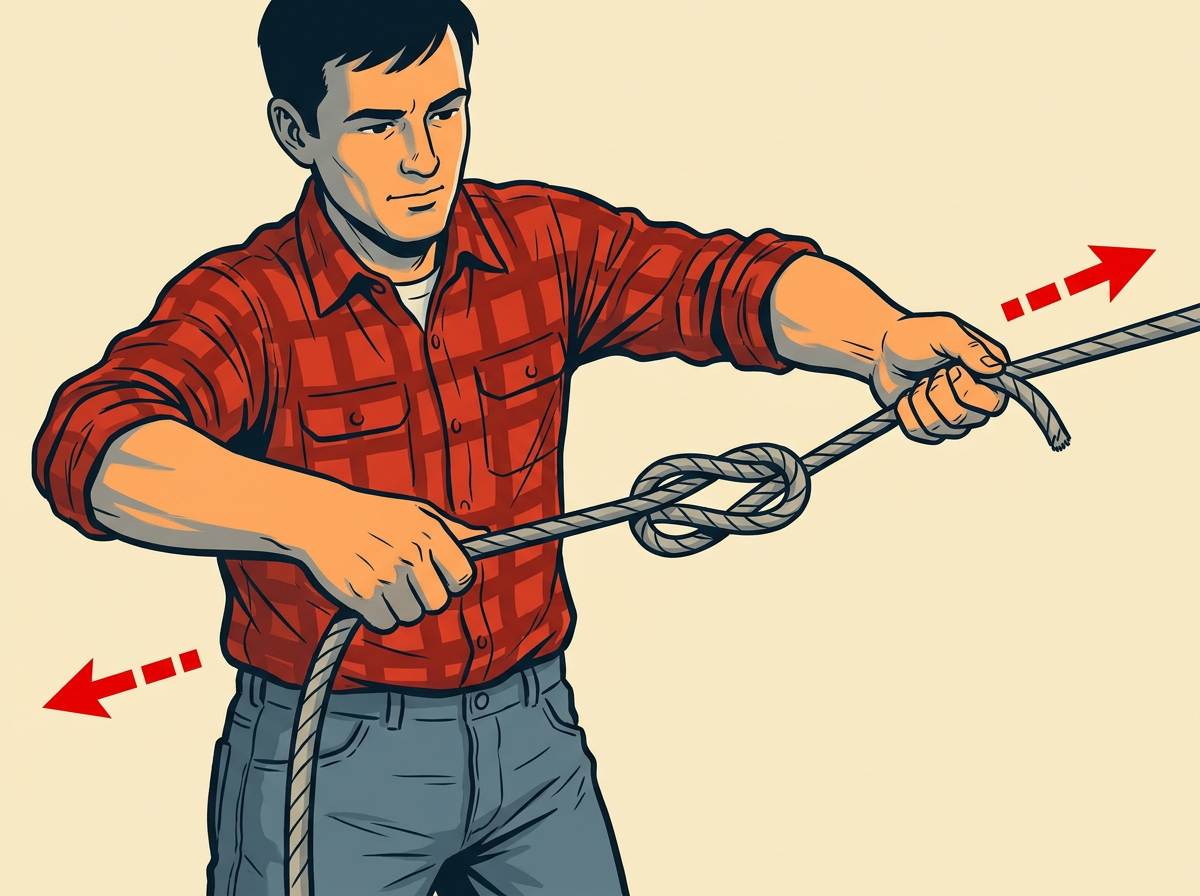
The wraps slide together and lock. You know the knot is set when the big loop holds its size no matter how hard you tug it. If a gap remains between turns, pull the free end first then the standing part again.
The most common mistake
Starting with the working end under the standing part creates a slip knot that collapses under load. Cross the end over the standing part every time so the loop stays fixed.